Setting Up a Simple AWS DevOps Pipeline for Deploying Containers on an EKS Cluster
In the world of cloud computing, AWS (Amazon Web Services) provides a robust platform for building and deploying applications. One of the most powerful tools AWS offers is EKS (Elastic Kubernetes Service), which allows you to run containerized applications using Kubernetes. This guide will walk you through a simple DevOps setup for deploying containers on an EKS cluster, highlighting the essential steps to get your pipeline up and running.

1. Overview of AWS DevOps and EKS
AWS DevOps combines development and operations practices to automate and streamline the software delivery process. By using containers, your applications become more portable and consistent across different environments. EKS, AWS’s managed Kubernetes service, helps you orchestrate these containers at scale, handling tasks like deployment, scaling, and management.
2. Prerequisites
Before starting, ensure you have the following:
- AWS Account: An active AWS account with sufficient permissions to create and manage EKS clusters.
- AWS CLI: Installed and configured on your local machine.
- kubectl: The Kubernetes command-line tool installed and configured.
- Docker: Installed on your local machine to build and push container images.
- IAM Role: Sufficient IAM roles and permissions for managing EKS, EC2 instances, and other AWS resources.
3. Step-by-Step Setup
Step 1: Create an EKS Cluster
- Launch an EKS Cluster:
- Use the AWS Management Console or AWS CLI to create an EKS cluster.
- Specify the VPC, subnets, and security groups for your cluster.
- Attach an IAM role with the necessary permissions to your EKS cluster.
eksctl create cluster --name my-cluster --region us-west-2 --nodegroup-name my-nodes --node-type t3.medium --nodes 3 --nodes-min 1 --nodes-max 4 - Configure kubectl:
- Update your Kubernetes configuration file to connect
kubectlto your EKS cluster.
aws eks --region us-west-2 update-kubeconfig --name my-cluster - Update your Kubernetes configuration file to connect
Step 2: Build and Push Docker Images
- Create a Dockerfile:
- Write a
Dockerfileto containerize your application.
FROM nginx:alpine COPY . /usr/share/nginx/html - Write a
- Build the Docker Image:
- Build the Docker image locally.
docker build -t my-app . - Push to Amazon ECR (Elastic Container Registry):
- Create a repository in ECR and push your Docker image.
aws ecr create-repository --repository-name my-app docker tag my-app:latest <aws_account_id>.dkr.ecr.us-west-2.amazonaws.com/my-app:latest aws ecr get-login-password --region us-west-2 | docker login --username AWS --password-stdin <aws_account_id>.dkr.ecr.us-west-2.amazonaws.com docker push <aws_account_id>.dkr.ecr.us-west-2.amazonaws.com/my-app:latest
Step 3: Deploy the Application on EKS
- Create a Kubernetes Deployment:
- Define a Kubernetes deployment YAML file.
apiVersion: apps/v1 kind: Deployment metadata: name: my-app spec: replicas: 3 selector: matchLabels: app: my-app template: metadata: labels: app: my-app spec: containers: - name: my-app image: <aws_account_id>.dkr.ecr.us-west-2.amazonaws.com/my-app:latest ports: - containerPort: 80 - Apply the Deployment:
- Use
kubectlto deploy your application to the EKS cluster.
kubectl apply -f deployment.yaml - Use
- Expose the Application:
- Create a service to expose your application to the internet.
apiVersion: v1 kind: Service metadata: name: my-app-service spec: type: LoadBalancer selector: app: my-app ports: - protocol: TCP port: 80 targetPort: 80- Apply the service using
kubectl.
kubectl apply -f service.yaml
Step 4: Automate with CI/CD Pipeline
- Set Up a CodePipeline:
- Use AWS CodePipeline to automate the deployment process.
- Define stages for source, build, and deploy using CodePipeline, CodeBuild, and CodeDeploy.
- Integrate with CodeCommit/GitHub:
- Set up your source stage to trigger on code changes pushed to AWS CodeCommit or GitHub.
- Build with CodeBuild:
- Use CodeBuild to automate the Docker image build process and push the image to ECR.
- Deploy with CodeDeploy:
- Automate the deployment process to EKS using CodeDeploy.
4. Monitoring and Scaling
- Monitor Your Cluster:
- Use Amazon CloudWatch and AWS CloudTrail to monitor your EKS cluster and track resource usage, logs, and application performance.
- Autoscaling:
- Enable cluster autoscaling to dynamically adjust the number of nodes in your cluster based on load.
- Health Checks:
- Implement liveness and readiness probes in your Kubernetes configurations to ensure that your applications are running smoothly.
Conclusion
Deploying containers on an EKS cluster using AWS DevOps practices simplifies the management and scalability of your applications. By automating the process with a CI/CD pipeline, you can ensure consistent and reliable deployments, allowing your development and operations teams to focus on innovation rather than infrastructure management.
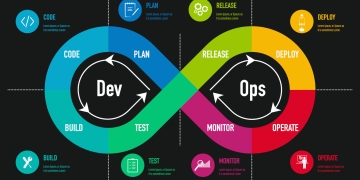
Summary: AWS DevOps Process for EKS Deployment
A simplified AWS DevOps process flow:
- Code: Developers push code changes to a repository (e.g., CodeCommit or GitHub).
- Build: CodePipeline triggers CodeBuild to build a Docker image from the code.
- Push: The Docker image is pushed to Amazon ECR.
- Deploy: CodeDeploy deploys the image to an EKS cluster, creating or updating the Kubernetes deployment.
- Monitor: The application is monitored using CloudWatch and CloudTrail for performance and scaling.


